PowerPoint 3D Models are like shapes, only with the complete ability to rotate the shape a full 360 degrees, tilt up and down, and even make the 3D model appear to move in 3D when combined with the newer Morph transition, also available to Office 365 subscribers.
How to Insert a 3D Object into PowerPoint
- If you have Office 365 and are a member of the Insider program with updates installed, then open PowerPoint 2016 and navigate to the Insert tab.
- In the Illustrations Group, click the 3D Models button. That will display a sub-menu, with two options: From a file… or From Online Sources…
 If you have a 3D file stored locally on your computer or network drive, choose “From a file.” But if you would like to browse what options are available from Remix 3D, a free community 3D sharing site, you may click on “From Online Sources.” For the purposes of this demo, I am going to show you the “From a file” option, as Remix 3D is quite new and a bit lacking in its examples at this time.
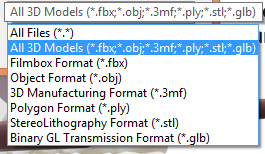
 - Click the From a File option in the sub-menu to launch the insert 3D model window, and navigate to where you 3D file is located on your computer.
 PowerPoint will work best with .fbx and .obj files in my experience, but will also work with .3mf, .ply, .stl, and .glb file types as well.

- Select the file you wish to insert and click on the Insert button to insert the 3D model into PowerPoint.
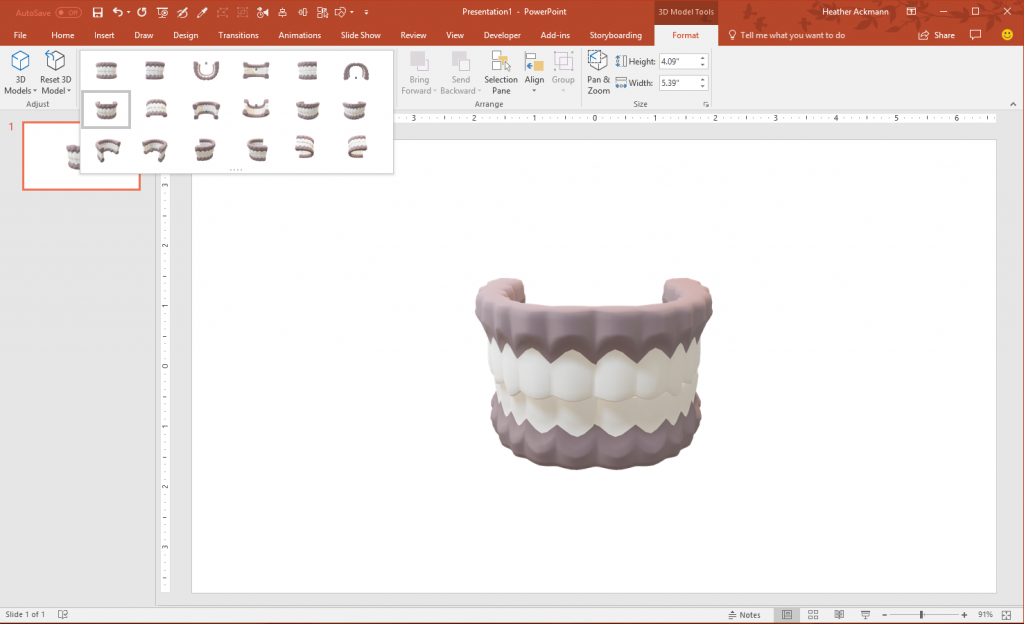
- Click on the 3D object to bring up the contextual 3D Model Tools Format tab for additional 3D controls on the ribbon and on the object itself. From here, you can rotate the object using your mouse or through the 3D Model View buttons on the ribbon gallery.

How to Animate a 3D Model
To prepare to animate our model of our teeth, we are going to be using the new Morph transition. Technically, it is not an animation that appears on the slide itself, but between slides (as it is a slide transition). So, we are going to need a duplicate of our original slide to apply the transition to.
- Right-click on the slide in the Slides Pane and click on Duplicate Slide.

- Next, on the duplicated slide, move, resize, reposition, and rotate the 3D model as you wish.
- Then, apply the Morph transition the second slide.
 You should see a preview of what the transition will look like in PowerPoint. If not, you can click the Preview button in the upper left-hand corner of the Transition ribbon, or click on the star next to the slide number to preview all slide animations and transitions.
Exporting Your 3D Animation as a Video
If you’d like to share your 3D animation with someone who does not have access to these cool new features in PowerPoint, you can always export your final presentation as a video from PowerPoint.
- Click on File menu, go to Export, and click on Create a Video.

- From here, to the right, you may choose the video quality, any additional seconds you’d like spent on the slides or whether or not to use recorded timings and narrations if you have them recorded in your presentation.
- Click Create Video to open the Save As window. PowerPoint will default to the .mp4 file type (recommended) but you may choose .wmv (Windows Media Video) if you prefer.
Here is what a small 3D model looks like as a video:
And here is what my final presentation looks like when combined with text and other objects and PowerPoint animations:
So, as you can see, this opens up some new possibilities with animation and video in PowerPoint.
At the time of this post publication, if you are an Office 365 subscriber and a member of the Office Insider program, you have access to PowerPoint 3D Models. If you are not an insider, don’t worry. Your time will come soon enough!


